
I’m sure this scenario is not foreign to many of you. AWS is hugely popular because of its “metered billing”, charging you just for what is turned on, but is also dangerous because the meter may be running even if we aren’t using the resources. Many seasoned professionals (myself included) have experienced surprise charges, spiking bills, and run-away resources.
The easy answer is to say, “Be sure to turn everything off after the tutorial,” and hopefully most tutorials say at least this. But sometimes we just plain forget, or want to show it off again later, then forgetting to stop the services. In either case, I have a great AWS built-in solution to talk about that can help you manage your spending at AWS: the billing page.
I will step you through creating a trigger that, once you hit 10 dollars, will alert you via email. There are other options that are available to you such as text for notification. There are also options that have the ability to shut down some of the services (but we will not cover that in this tutorial).
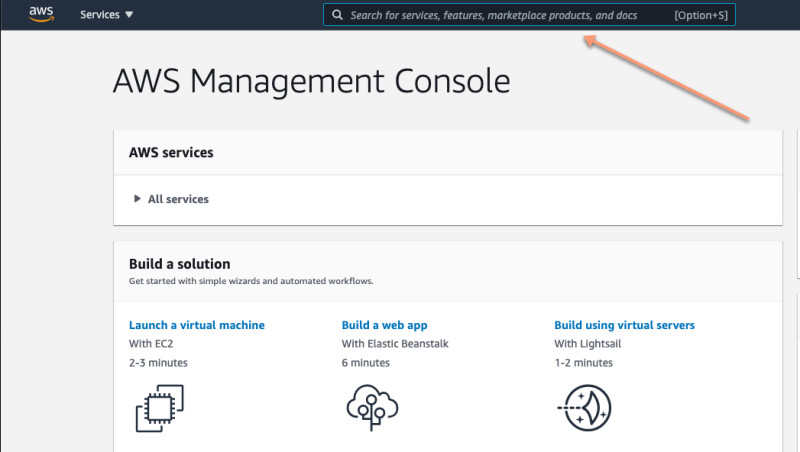
- Log into your AWS Console.
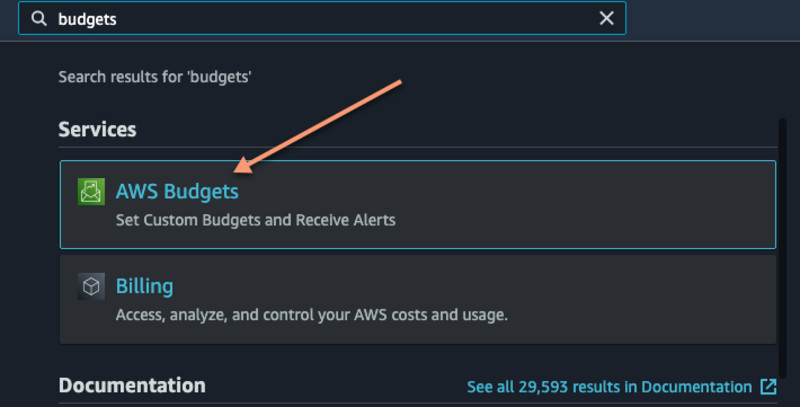
- From the search menu at the top, search for budgets. Find and select “AWS Budgets”.
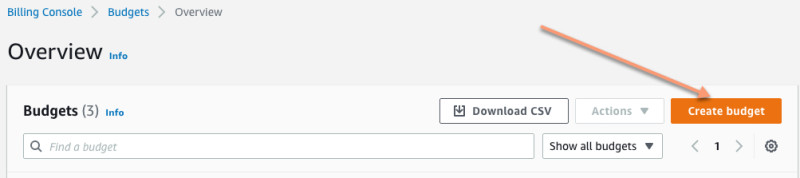
- The Overview pages will show any budgets you have set up.
- We will create our first alert at $10.00. Select the “Create budget” button.
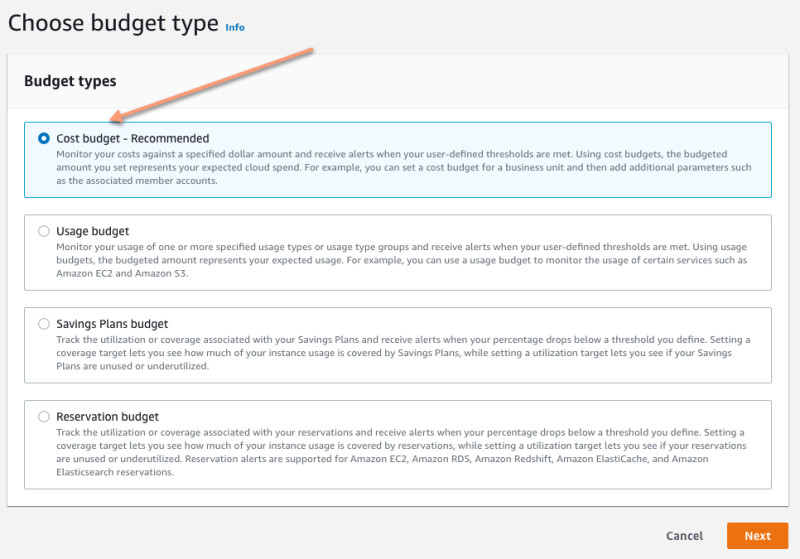
- From the Budget types select “Cost budget”, then click Next.
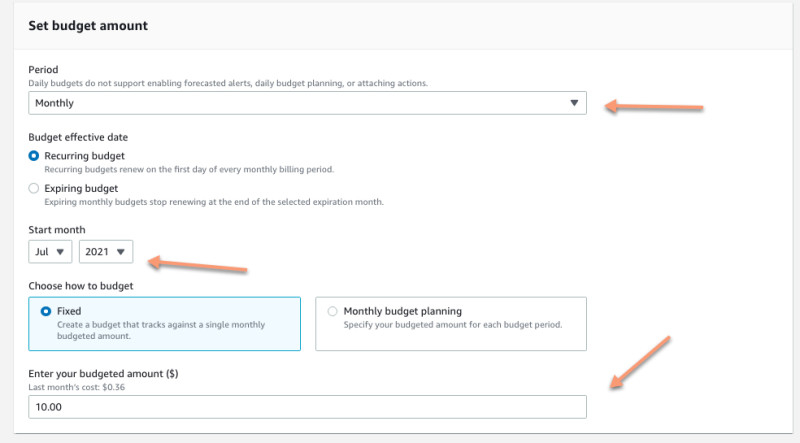
- Next we will set some flags. I will go through a single set, but please research and explore the other options. Scroll down a little to the “Set budget amount”, then:
- From the period dropdown select “Monthly”.
- Click the radio button for “Recurring budget” (which will bill month-to-month).
- Select the month you want to start.
- Click the radio button for “Fixed”.
- Finally enter the amount you want to track. (Eg: 10.00)
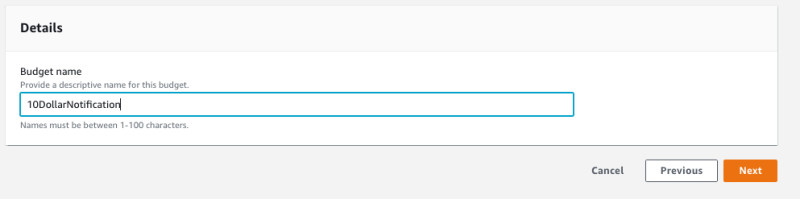
- There is some additional information in the budget scope (we will scroll past this).
- At the very bottom give your budget a name, like “10 Dollars per month”.
- Click next.
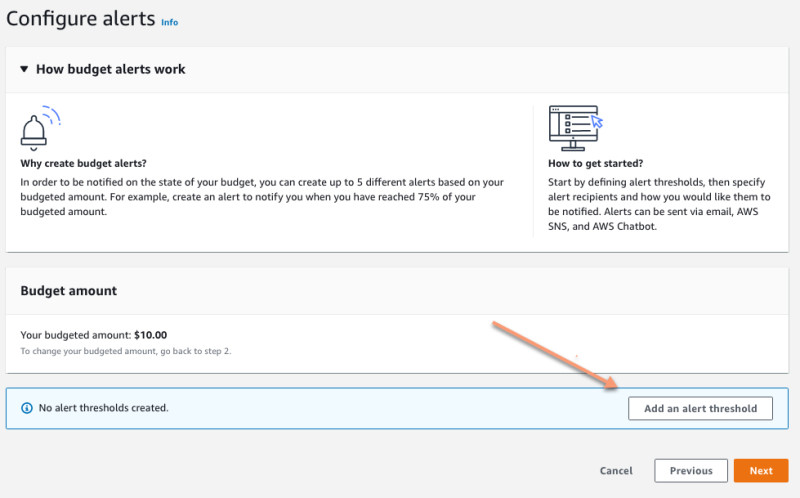
- You can manage different percentages of the amount that you set by clicking “Add an alert threshold”.
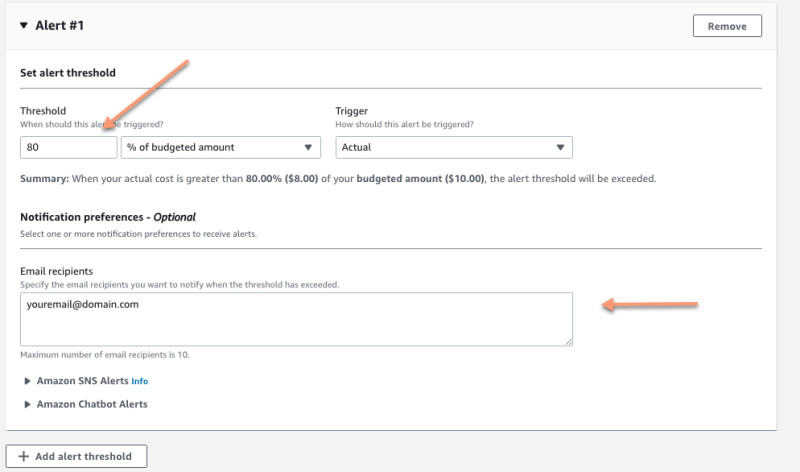
- For this example, we will do 1 alert. Put “100%” as the threshold and put “Actual” as the trigger.
- Add your email to the email recipients.
- You can add optional SNS alerts and chatbot alerts (we will skip this as well).
- Click Next.
- The next page will show you an overview of your alerts.
- Press Next.
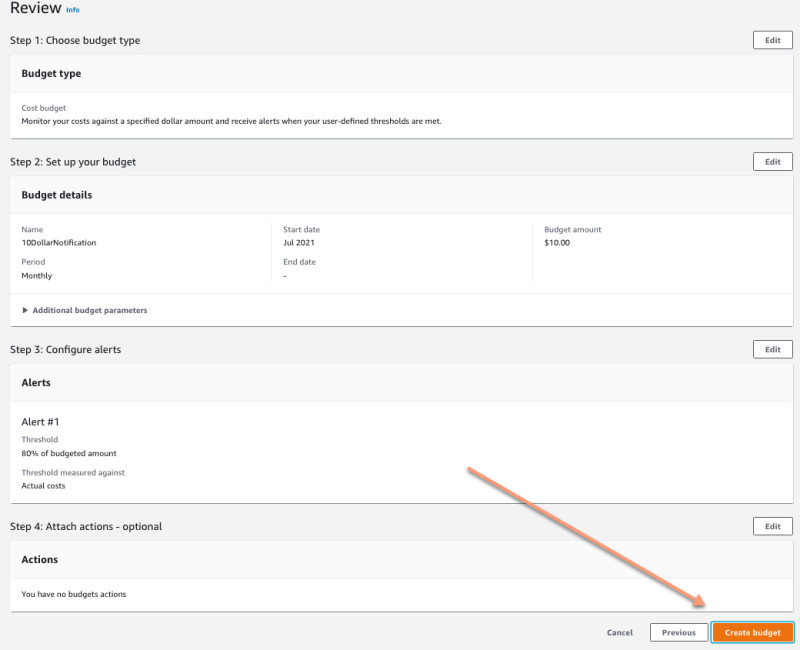
- The last page will be an overview of your selected options. You can adjust them as needed. When you are finished, click on “Create budget”.

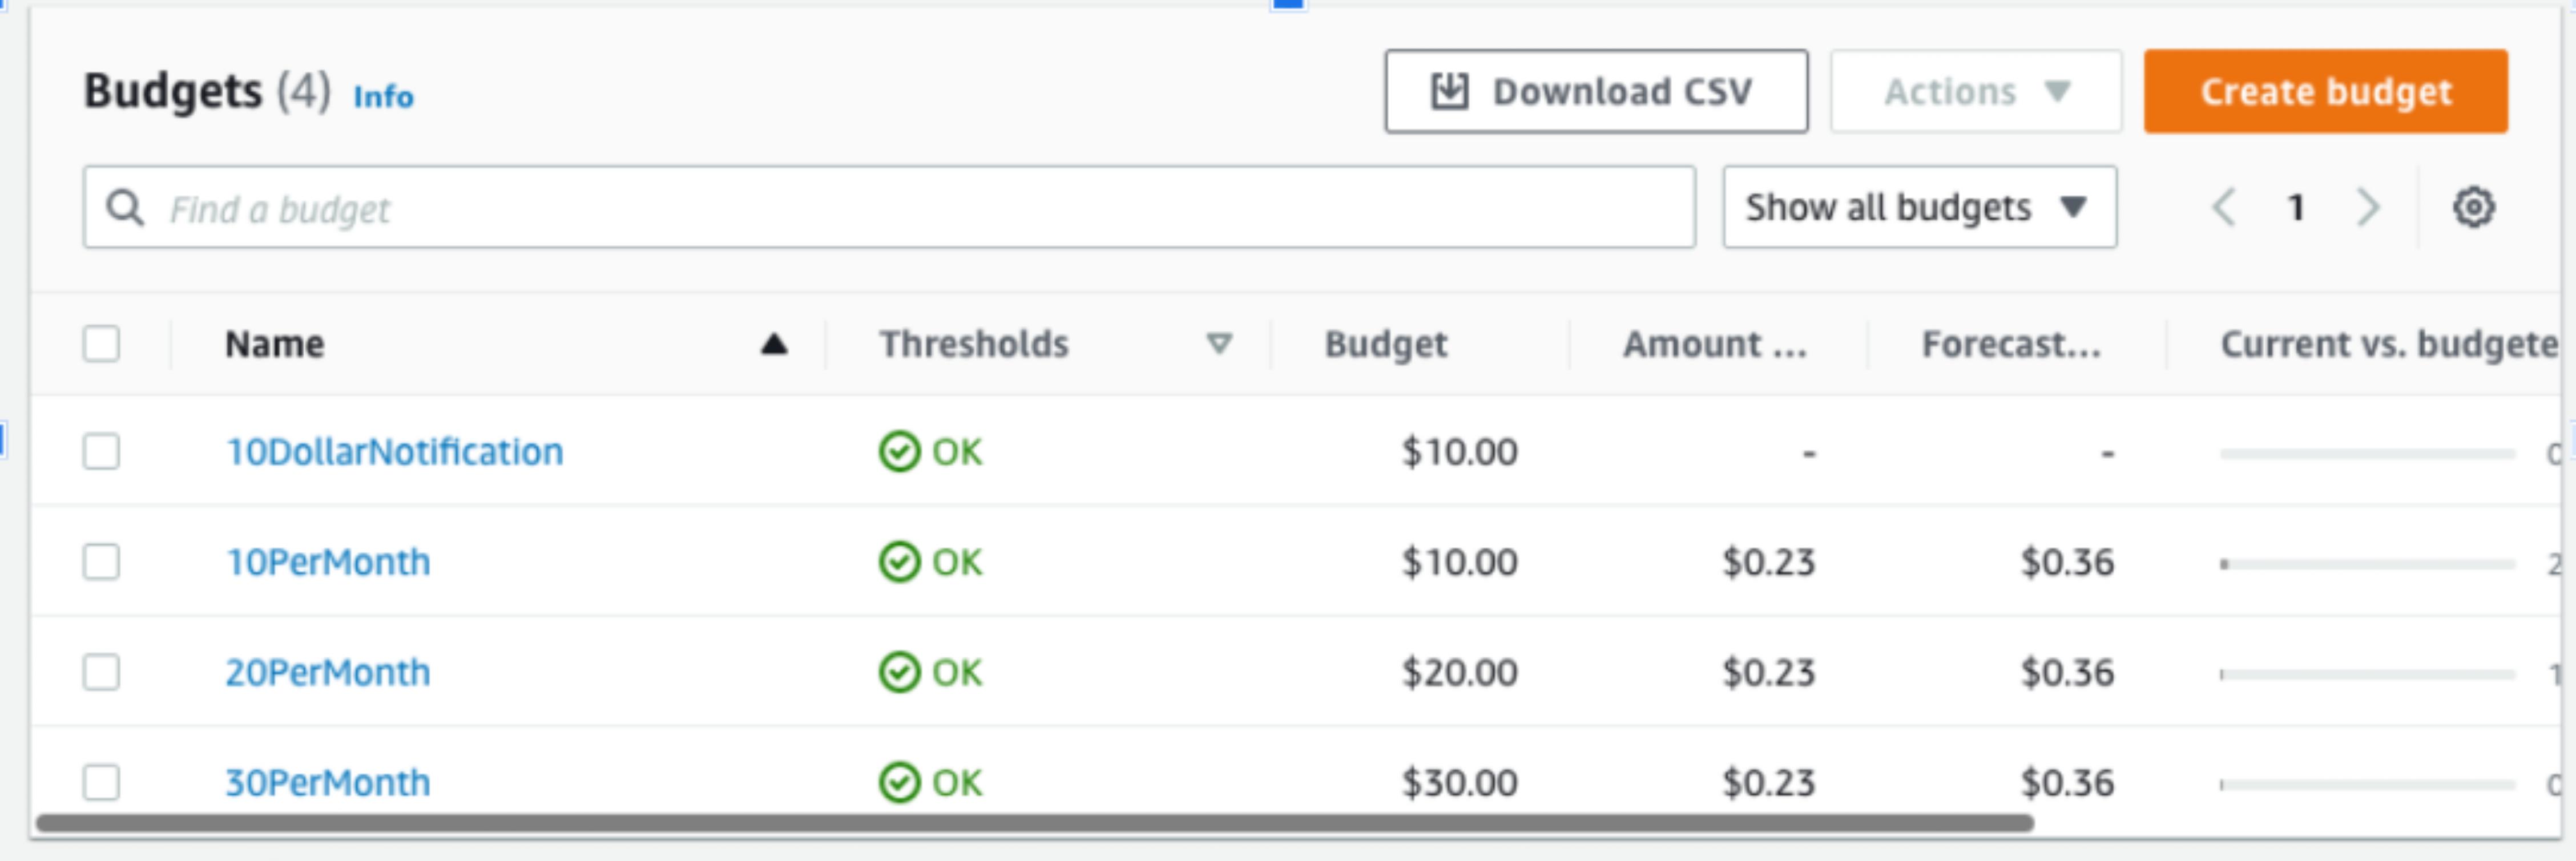
And you are all set! You should now get alerted to how much your AWS account is racking up if you’ve left something running. Pay close attention to those alerts, and be ready to shut down services if you are getting charged more than you like.
If you are looking to dive deeper into what budgets can do, be sure to look at budget actions. When you hit set thresholds, you could shut down services or remove instances. This does take some additional setup steps like setting up an IAM user with specific permissions. This will be a fun and rewarding ‘rabbit hole’ to dive into.